Unity Student Trials Family-Size Hoophouse
Posted: March 30, 2009 Filed under: Gardening Leave a comment

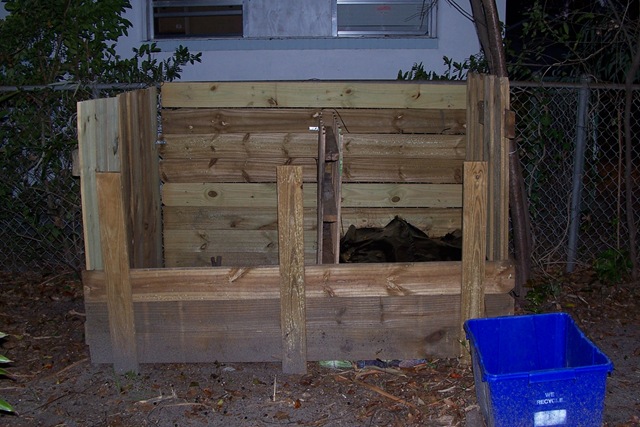
This 8’ x 8’ hoophouse was built from scrap materials and $50 worth of new materials at Unity College, to see if that area could supply greens through the winter. The College’sregulation-sized hoophouse, used in an herbaceous gardening class, is in the background. English photo.
Troubleshooting on the Ground
by Holli Cederholm
Situated in the center of the Unity College campus in Unity, Maine, a rainbow-shaped swath of vegetable beds offers more than just produce for the college student center. This potpourri is designed to show students how food grows, from seed to seed. Included in this growing area is a production hoophouse, which teaches students how to get a jump on the spring season or fight back the encroaching fall frost. The arching, 24’ x 26’ metal structure, manufactured by Ed Person of Moultonborough, New Hampshire (www.ledgewoodfarm.com), is covered with greenhouse-grade plastic. It offers an impressive opportunity to extend the growing season in cold northern New England.
But, according to Unity student and garden volunteer Sara Trunzo, its size and seamless structure might be more intimidating than inspiring to a novice grower or home gardener. Trunzo and Doug Fox, Professor of Landscape Horticulture, wanted to see the college install a less ambitious hoophouse – something that anybody could build, inexpensively.


The entrance is simply a piece of plastic that rolls and is held up by twine. English photos.
The back wall.
Rebar bends over the top of the house.
A cross piece lends support.


U-bolts hold rebar in place.
Pieces of plastic milk jugs keep the greenhouse plastic from being torn by staples.
Last year, Trunzo and Fox created a new demonstration garden. Trunzo says she found her inspiration in the food philosophies of Eliot Coleman, commercial market gardener and author of The New Organic Grower. Coleman argues the economics and environmental benefits of extended season gardening, and he claims that one person needs only 8’ by 8’ to grow enough greens to last through the winter.
Trunzo decided to demonstrate how easily Coleman’s theory could become practice. “I wanted to take his idea really literally, and have it be really cheap,” says Trunzo. And, she did.
Unity College administrators offered a budget of $50 and permission to experiment. That, Trunzo says, is all it takes.
With the help of Fox and Jason Reynolds (a Unity student at the time; now a graduate), Trunzo built a hoophouse with an 8’ x 8’ footprint. They started by gathering reusable materials, including scrap cedar from local mills and plastic left over from construction of the first hoophouse. The allotted budget went to purchasing rebar for the frame.
The construction was based more on intuition than engineering. Without even sketching a design, Trunzo, Fox and Reynolds began piecing things together.
“First we bent four lengths of rebar so that each one was house-shaped. Then we dug holes and set posts for the end walls,” says Trunzo.

View from outside, back. English photo.
The four rebar arcs provide most of the structure but are complemented by a ridge-beam, end walls and hip boards of scrap lumber, which provide support for the heavy plastic sheeting. The rebar is secured to the hip boards by U-bolts.
After the frame was up, the plastic was stretched and held in place by staples, with an interface of plastic cut from recycled milk jugs to prevent the staples from tearing the greenhouse plastic.
The trio completed the miniature hoophouse in two afternoons, but Trunzo believes it could be done faster, especially with pre-planning on paper.
A full year after completion, the hoophouse is living up to Trunzo’s ambitions – and then some. It survived a full winter, along with several snowfalls of over 20 inches each. Its plastic is now rust-stained in places and flaps in the breeze, but that’s fine, says Trunzo. The occasional gust of wind exposes a quickly crafted frame of rebar and scrap lumber, along with a love for local food production. Housed beneath this thin sheet of salvaged plastic, spinach broke ground last spring as testimony to an experiment in season extension.
“This hoophouse offers a lot of lessons,” says Trunzo. One concerns fine-tuning Coleman’s theory for a very small structure, which may gain and lose heat faster than a larger hoophouse. Trunzo says that Coleman’s 8’ by 8’ footprint might have been intended as part of a larger hoophouse.

In spring, the tiny hoophouse is bordered by a garden of garlic, asparagus and other vegetables and herbs. English photo.
Still, she has had some success extending the season with this miniature model. “We’ve had the survival of some things, like mustard greens and kale,” Trunzo notes.
This prototype also taught Trunzo about the importance of design details. Having worked with the hoophouse through a full growing season, she says she might make a few changes, such as fashioning roll-up sides. But, overall, she says she’s satisfied in its demonstration of how a little time and a slight investment can help any household garden through the seasons.
“I like that this hoophouse is homemade,” concludes Trunzo. “People can look at it and say, ‘It doesn’t even look like it’s made that well … I can make it better.’ And then they can go do it.”

The proof is in the spinach. English photo.
About the author: Holli Cederholm is a 2007 graduate of the Environmental Writing program at Unity College.
My Square Foot Garden
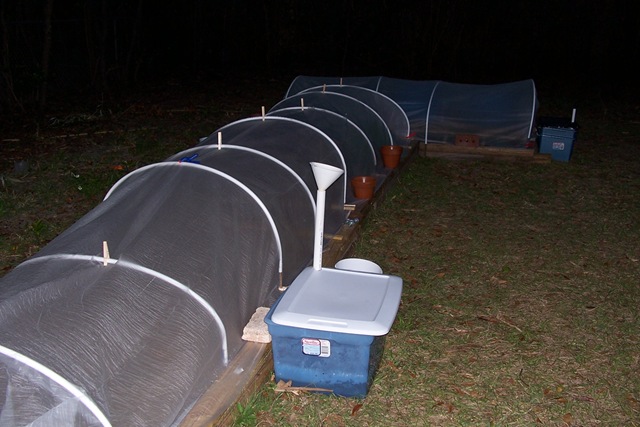
Posted: February 14, 2009 Filed under: Gardening 1 CommentIt has been a week or so since I posted…so sorry! Life has been a bit hectic, a week of a hard freeze every night…and this in Florida!! My new job started and in the middle of it all I had to get row covers and blankets for the garden. Here is what my garden looked like for a week.
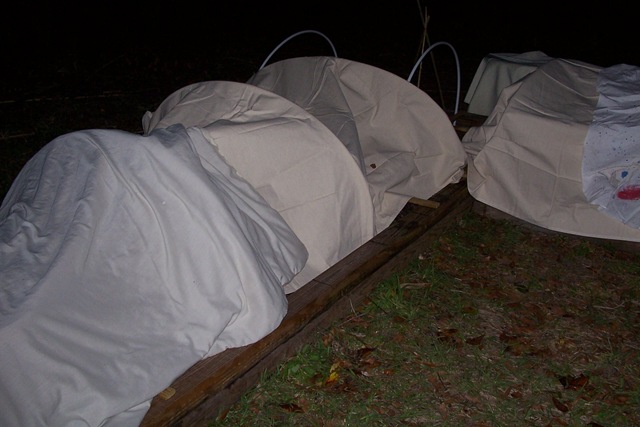
I made it through, only lost one sweet potato plant. Here is a pic of my row covers;
 Last July I went to work at a health food store here in Jacksonville. Everything served in the deli there is organic, so I began bringing home some seeds and scraps home. I sprouted peppers, then an onion. Then I started bringing home huge bags of veggie and fruit scraps and put them in my compost. It was about this time that I discovered Bokashi composting. It is a way to take kitchen scraps and get compost from them in 4 weeks! You may not know that normal outdoor composting can take up to a year to get ready to be put into the soil. This method is odor free and can be done indoors.
In August I laid out my garden, in an L-shape. I got garden timbers and put them in place, covered the soil and weeds with unwaxed cardboard. I got potting soil, put it about 4 inches deep and started adding ground egg shells,coffee grounds, compost, manure and vermiculite.
In August I planted sweet potatoes, onions, and bell peppers in one end of the garden and started building up the soil in the longer section. In September I planted flowering kale, Swiss chard, basil and red potatoes. This week I planted tomato seedlings, nasturtiums, lavender. I have been going to a produce market near my house few times a week and getting veggie scraps for compost. I am getting coffee grounds from Starbucks each day. My soil is looking great!
Peppers, Marigolds and beets I have been eating greens from since September!

Lettuce in homemade grow box
Lettuce with cover
Compost Bin is mostly for grass and yard stuff as I compost all kitchen scraps by the Bokashi method of composting. For the outdoor bin I add coffee grounds and boxes of veggie scraps from a local produce store.
Victory Gardens: War on Waste
Posted: February 9, 2009 Filed under: Gardening, Going Green; How and Why... 1 CommentFrom Treehugger;
by Bonnie Alter, London on 05.30.08
 I
I
It’s not quite war time, although sometimes it feels like it… Endless articles on the “credit crunch”, cutbacks and soaring food prices are putting a chill in the air. During WW2 the British were digging Victory gardens in squares and public parks across the country. They were growing their own food in very tight compact spaces as a response to food shortages due to the wartime restrictions on food imports. Wartime principles of eating seasonal food grown locally and organically have a message for us now.
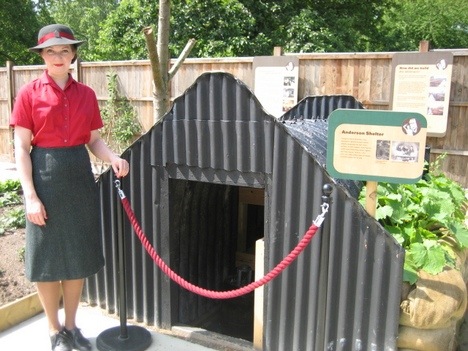
In the heart of historic St. James’s Park, the Dig for Victory allotment garden has been created to bring back the flavour of those times and encourage people to embrace the idea of growing your own. For the second year running, a small allotment garden has been created in the spirit of those from the war. Included is an Anderson Shelter (pictured), a bomb shelter made of prefab. metal sheets and secured with bags of sand. Zucchinis are growing around and over it as camouflage. The beds are raised to allow for deep rooting. Companion planting was encouraged–different plants side by side can repel insects or attract them. The approach was quite organic, although the intent was to produce crops with the highest nutritional value.

The plots made use of discarded household items. Egg cartons and toilet paper rolls could be used as planters and old window frames made good cold frames. Net curtains provide protection from birds and hot sun by deflecting rays away from the plants.
By 1945, 1.5 million allotments were being cultivated in the UK, supplying 10 per cent of food needs. To supply meat, communities were encouraged to rear their own livestock with the opportunity to join a pig or rabbit club. Rationing forced people to cook with leftovers.
There were recycling campaigns to encourage people to collect paper to be recycled into containers for shells, cartridge packs, log books and military maps. Garbage cans were placed at the ends of streets for householders to deposit unwanted food to be used to feed pigs. Rags, bottles and bones were collected, too – meat bones were used for making explosives. Metal was recycled to build tanks and planes and for munitions.
According to historians from the Churchill Museum: “Clothes rationing was introduced in June 1941 due to a shortage of imported fabric and the need for cloth for uniforms, parachutes and hospital bedding. Reuse and recycling tips included reproofing raincoats by rubbing beeswax over the inside, then ironing.
Leather looks as good as new when treated with sour milk rubbed in with cloth. Old shoes could be revived by rubbing them with banana skin – the perfect accessory for a “new” skirt made out of men’s old trousers.”
Recycling was born of necessity. With the changing world that we live in, it looks like it is going to become a necessity again. :: The Independent Via :: Churchill Museum and Cabinet War Rooms
How to Save Tomato Seeds
Posted: January 14, 2009 Filed under: Gardening Leave a comment

It’s nice to be able to save your own tomato seeds!
You may have brought home a particularly delicious tomato from the supermarket, or gotten an heirloom tomato from a Farmer’s Market, or grown one in your own garden that is so wonderful you want to save the seeds from it and grow them next year. Nothing ever tastes quite as good as a home-grown tomato!
So, how do you save the seeds? The method is easy to do….it’s a little gloppy, and it’s a little funky, but you’ll be able to save seeds in a manner that will lesson the occurence of tomato disease while giving you plenty of seeds to germinate, and with left-overs to share or trade. This seed saving process is a process of fermentation.
Select to save seeds from a tomato that has a flavor that you love….if you’re a home gardener and saving seeds from tomatoes that are growing in your garden
Technorati Tags: square Foot Gardeningchoose tomatoes from the very healthiest looking plants.
Take your chosen tomato and slice it in half across the middle (it’s “equator”). With a spoon or your well-washed fingers scoop out the seeds and their gelatinous “goo” into a clean cup or container. Add a couple of tablespoons of water to the seeds. Cover the container with a piece of plastic-wrap and then poke the plastic-wrap with a paring knife or pen point to put a small hole in it…this is to allow for air-transpiration. (A little fresh air needs to get in and out of the cup to help foster fermentation.)
Place the container of seeds in a warm location; a sunny windowsill or the top of the refrigerator are both excellent sites to place the container of seeds. Now Mother Nature will take over and begin to ferment the seed and water mixture. This takes about two or three days. Each night remove the plastic-wrap, stir the seed and water mixture, and then replace the plastic-wrap, if you use a new sheet of plastic-wrap then don’t forget to put a small hole in it for air-transpiration. The top of the liquid will look “scummy” when the fermentation process has separated the “goo” from the seeds. It also helps destroy many of the possible tomato diseases that can be harbored by seeds.
Take the container of fermented seeds to the sink and with a spoon carefully remove the scummy surface. Then pour the container’s contents into a fine kitchen sieve and rinse the seeds with water several times…stir them while they’re in the sieve to assure that all surfaces are thoroughly rinsed. Give a few sharp taps to the sieve to help remove as much loose water as possible from the seeds.
Line an open plate with a piece of waxed paper or a large automatic-drip coffee filter. Place the rinsed seeds onto the wax paper or coffee filter and spread them about so they are in a single layer. Place the plate in a safe location where the seeds can dry for a few days. Stir the seeds a few times during the drying process to assure that all their surfaces are evenly dry. Spread them out again into a single layer after each time you’ve stirred them. Tomato seeds are thick and can take up to a week to dry thoroughly. If you’re having a rainy week that drying time may lengthen by a few days.
How do I know when the seeds are dry? Dried seeds move quickly and easily across a plate, they do not stick to each other.
How do I store them?
I like paper packets or some folks like plastic. Whichever envelope style you choose is a matter of personal preferance. If you choose to store your seeds in plastic the seeds must be BONE DRY….otherwise any moisture in the seeds will be transferred to all seeds inside the plastic packet, it will foster mildew and rotting and the seeds will be ruined.
If you’re going to plant the seed right away, you don’t need to do all that stuff.
Just put them in a strainer, wash the jelly off, and plant.I squeeze the tomato seeds on paper towels, let them dry and label them. When I want to plant, I tear off some seeds and shred the paper onto the soil (too lazy to grow starters in little pots) and water it in. They sprout just like that.
OR…I just squeeze the seeds right out onto the dirt and water them in. Works like a charm.

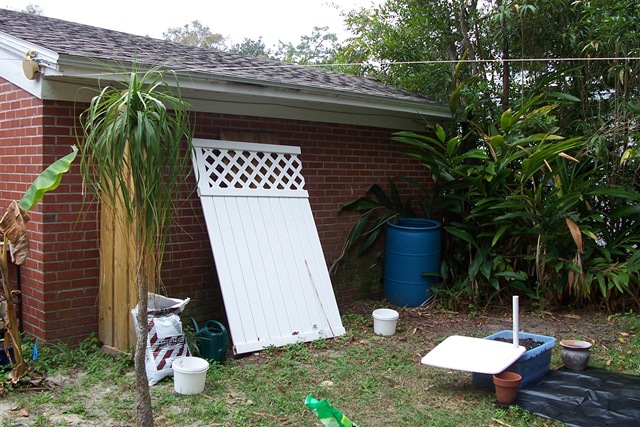
Garden Pics
Posted: January 6, 2009 Filed under: Gardening Leave a commentHere are pics of my garden, new grow boxes and solar shower (in progress) and my rain barrel.
 My Newest Growbox. 2 tomato plants will go in here.
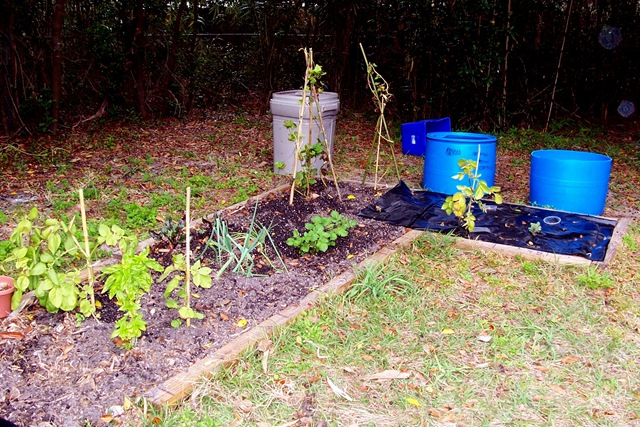 The blue half barrels are sweet potatoes and red potatoes. Instead of letting the vines cover the ground, or trellis, I add soil as they grow. This gives a large yield and keeps the plants energy in the root growing.
 Newest grow box has lettuce planted. Fencing is for solar shower in progress and the blue rain barrel is where I water my garden from, by hand. I am in the middle of converting my row garden into a Square Foot Garden.
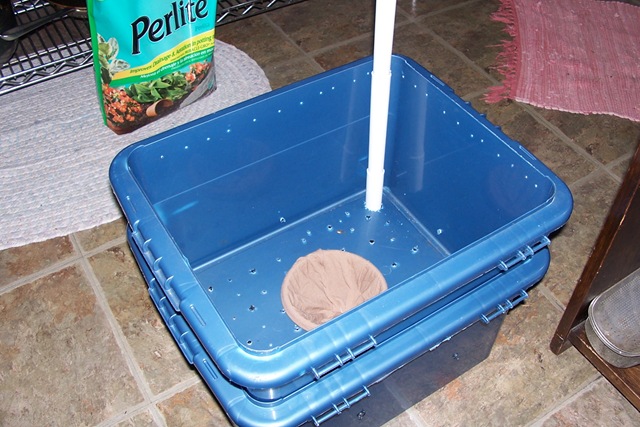
Grow Boxes. A self watering container is a container that has a water reservoir built in. This reservoir waters the plants sometimes for several days. These containers can also contain a fertilizer band to feed the plants for the season. This makes the process of growing almost any flower or vegetable very easy to do and is very productive. Another advantage is it can be placed somewhere where there is no garden such as a deck or patio.
I thought Earth Boxes were too expensive for what you get. So I make mine. Here is the instructable- Do It Yourself Grow Box
Bokashi Composting
Posted: December 27, 2008 Filed under: Gardening, Going Green; How and Why... 2 CommentsAbout 6 months ago I discovered EM- Efficient Microbes. Commonly called Bokashi Composting. It is an easy way to use table scraps for composting without the hassle of odor or fruit flies. Time from food scraps to compost, ready to go in my garden soil,is only a month!
Here is an introduction- EM for Bokashi Composting
Where to purchase EM- EMTrading or SCDWorld
Video- How to Make it Yourself- Making Bokashi
Where to buy Bran- Natural Grocers
My garden is growing wonderfully! I was able to build raised beds in just 4 months of intense composting. Working at a health food store for 4 months helped; I brought huge bags of lettuce home about once a week, along with other kitchen scraps, mixed with potting soil from Ace Hardware, Bone Meal, red worm casings and lots of moisture. I started composting in July, by October I was planting. I am now eating sweet potatoes, red potatoes, beet greens garlic, flowering kale from my backyard. The peppers didn’t survive the cold snaps (I am in Jacksonville, FL)

